

How To Clear Lsof Deleted Files In Linux
Losing files is really annoying for all of us. Many think that the data they have just lost is gone for good and there is no way it can be retrieved or recovered. The good ne-ws is that there are tools that can do magic, .i.e. they may help recover these files. It is important to know however that the earlier you notice the deletion, the more likely these tools will be able to recover your files. When you realize you've deleted something, you shouldn't try to mess up with the other files. Don't copy, cut or paste, don't manipulate files, don't delete and install programs unless this is absolutely necessary as it will be the case with the tools below.
In this tutorial, you will learn how to recover files on linux using some built-in and downloadable utilities.
lsof command
It is important that you do not panic as soon as you notice the data loss problem. Ideally, you have just deleted the document, even though you have edited it with another application or it has been opened by a process. The deleted file may still be open. You might be able to restore the document using Linux powerful lsof command , which stands for "list of open files".
Briefly, on a Linux filesystem, a file is just a link to an inode, which stores all of the properties of the file, such as ownership and permissions, data blocks addresses where the content of the file is stored on disk. When you carry out an 'rm' command on a file, you're actually deleting the link that is pointing to its inode, but not the inode per se. Other Linux processes (such as your video player) might actually still have it accessible or open. It's only after all links are suppressed that an inode along with the blocks of data it pointed to are actually made available again for writing.
Read: Five best open source Backup utilities for Linux
This delay is your lucky key to a happy and quick recovery. If a process for instance (still) has the file open, the data might still be available there, despite the fact that the file might already have gone (according to the directory listing ).
This is where the /proc directory, the Linux process pseudo filesystem, comes into play. Every Linux process has a directory there bearing its name and in which, we can find many useful things such an fd ("file descriptor") subdirectory which contains links to all the files that are still open by the process.
One can find there a copy of the file, even if it has been removed from the filesystem:
/proc/process_id/fd/file_descriptor
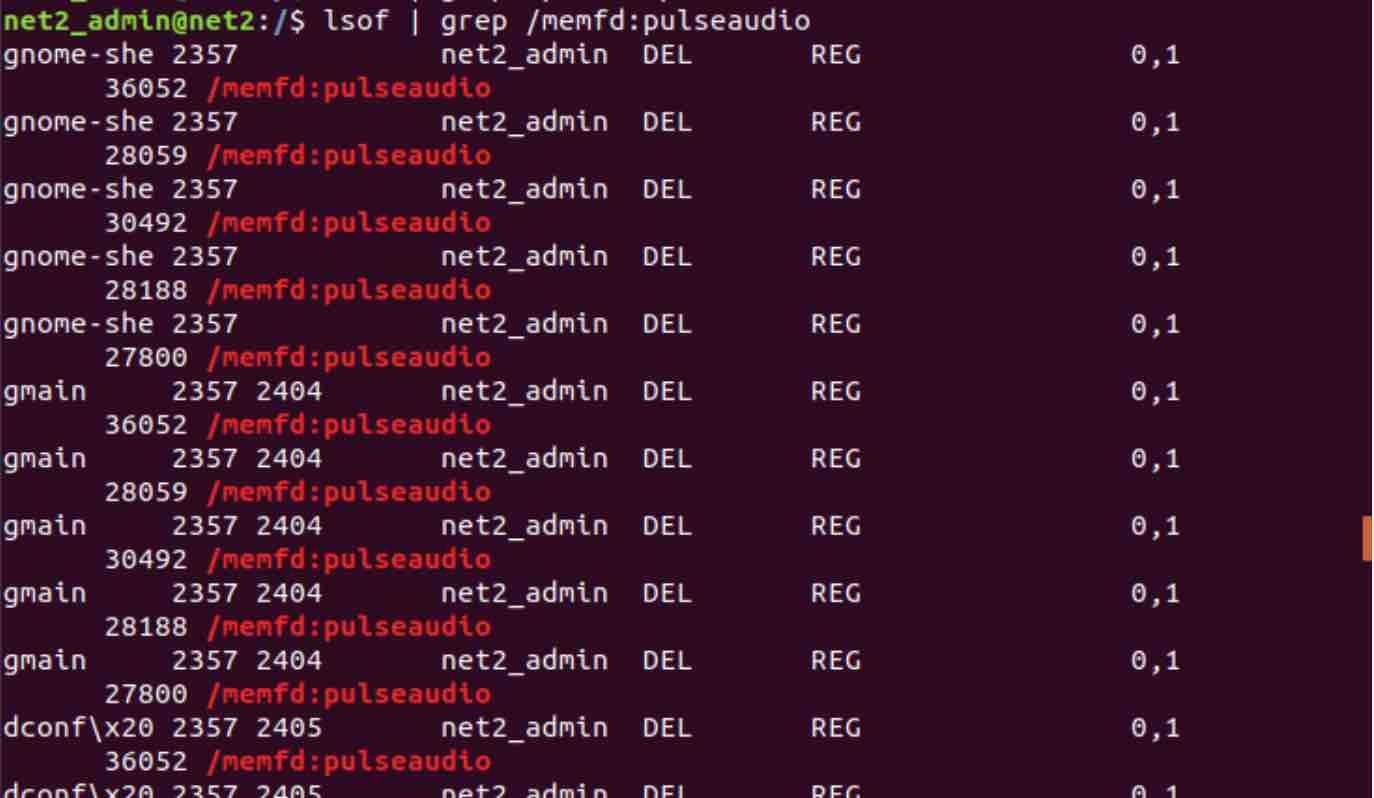
Therefore, If a running process still has the removed file open, you will be able to recover it through the open file descriptor above. To find out if this is the case, you can try out the following command:
lsof | grep "/path_to_file"
If the command above yields the output below:
progname 4171 user 22r REG 8,1 17192251 344118 /path_to_file
Jot down the PID that is shown in the second column, .i.e. 4171 as well as the number of the file descriptor (22r where "r" indicates that it is a regular file) which is located in the fourth column.
For example:
With this information, you will be able to recover the file by running the command:
cp /proc/4171/fd/22 /path_to_restored_file
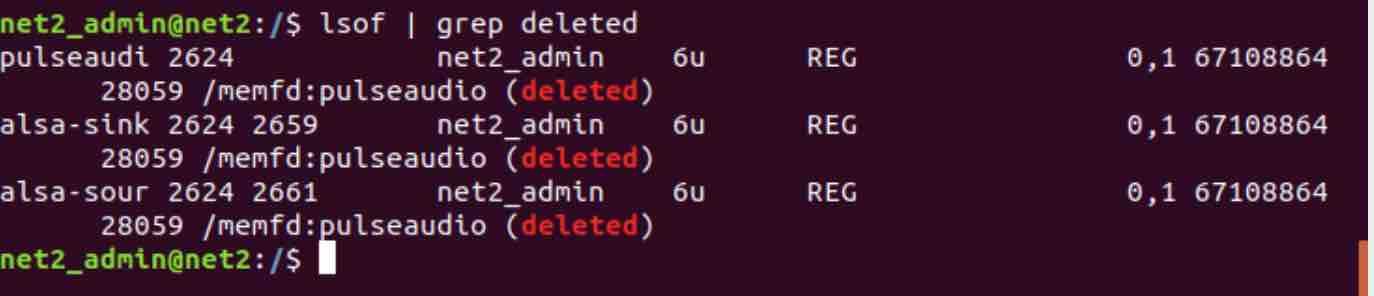
You can also execute :
lsof | grep deleted
Note : You might be tempted to use the -a flag with cp since you are restoring the file, but it is recommended not to do that, otherwise instead of simply copying the literal file content, you will be actually copying a (now-) broken symbolic link to the original file (that was once listed in its original directory).
TestDisk
TestDisk for linux is an open source cross-platform application that is used to recover lost partitions on a wide variety of file systems, deleted files of any type, photos, videos and others from practically any medium, SD cards, hard drives, CD-ROMs or USBs .It is distributed under the GNU General Public License (GPLV v2 +).
TestDisk promises to get the job done even if the media's file system has been badly damaged or reformatted.
With TestDisk, you can perform the following tasks:
- Rebuild NTFS boot sectors
- Recover FAT32 boot sectors
- Recover deleted partitions and fix errors in route tables
- Locate blocks ext2, ext3 and ext4
- Copy files from deleted partitions from FAT, exFAT, NTFS and ext2 file systems
Important: As mentioned above, once an image or file is accidentally deleted, DO NOT save any more images or files to that memory device or hard drive; Otherwise, you will replace the lost files. This means that when using PhotoRec , you should not choose to save the recovered files to the same partition on which they were stored.
Installation
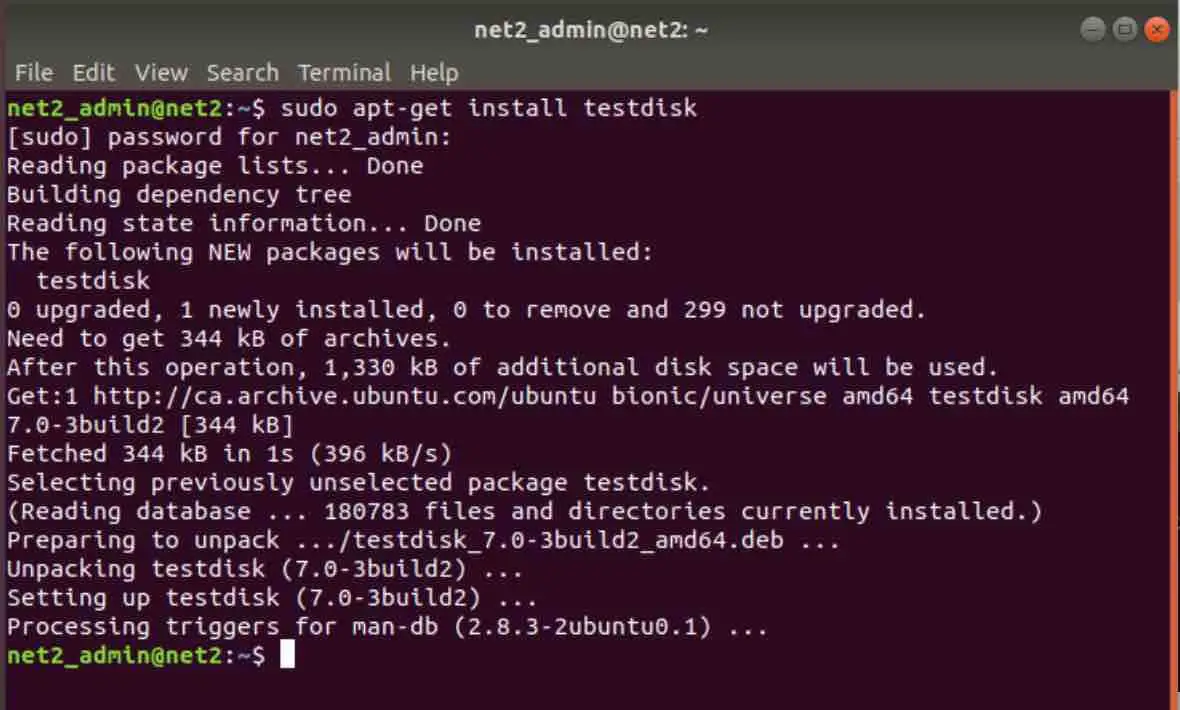
Open up your terminal and execute the command :
sudo apt-get install testdisk
Now you would need to run the testdisk utility :
testdisk
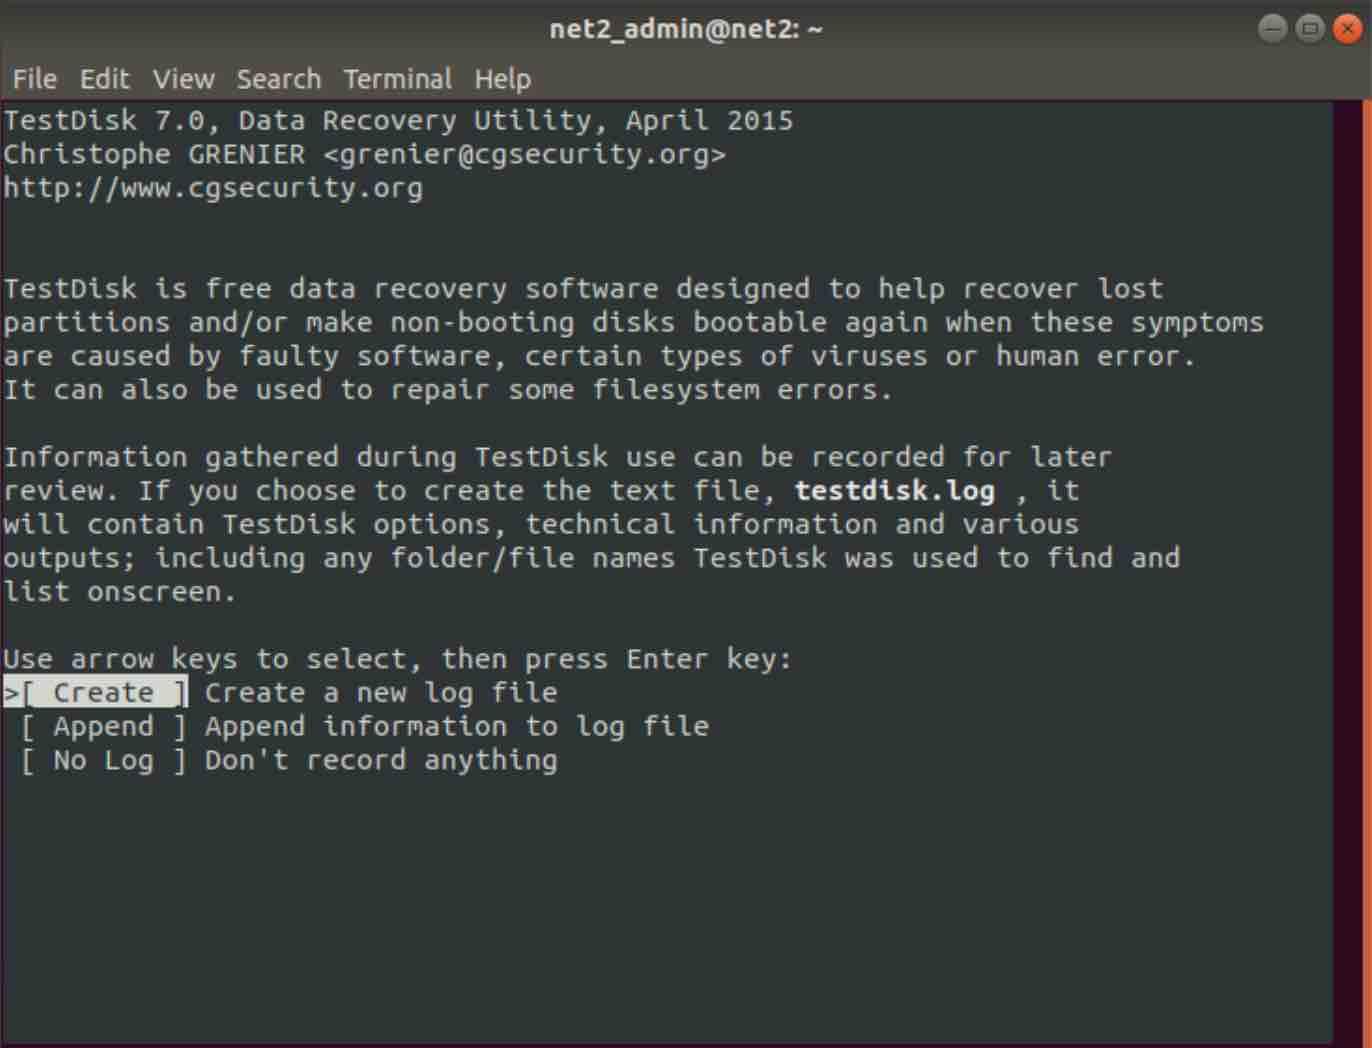
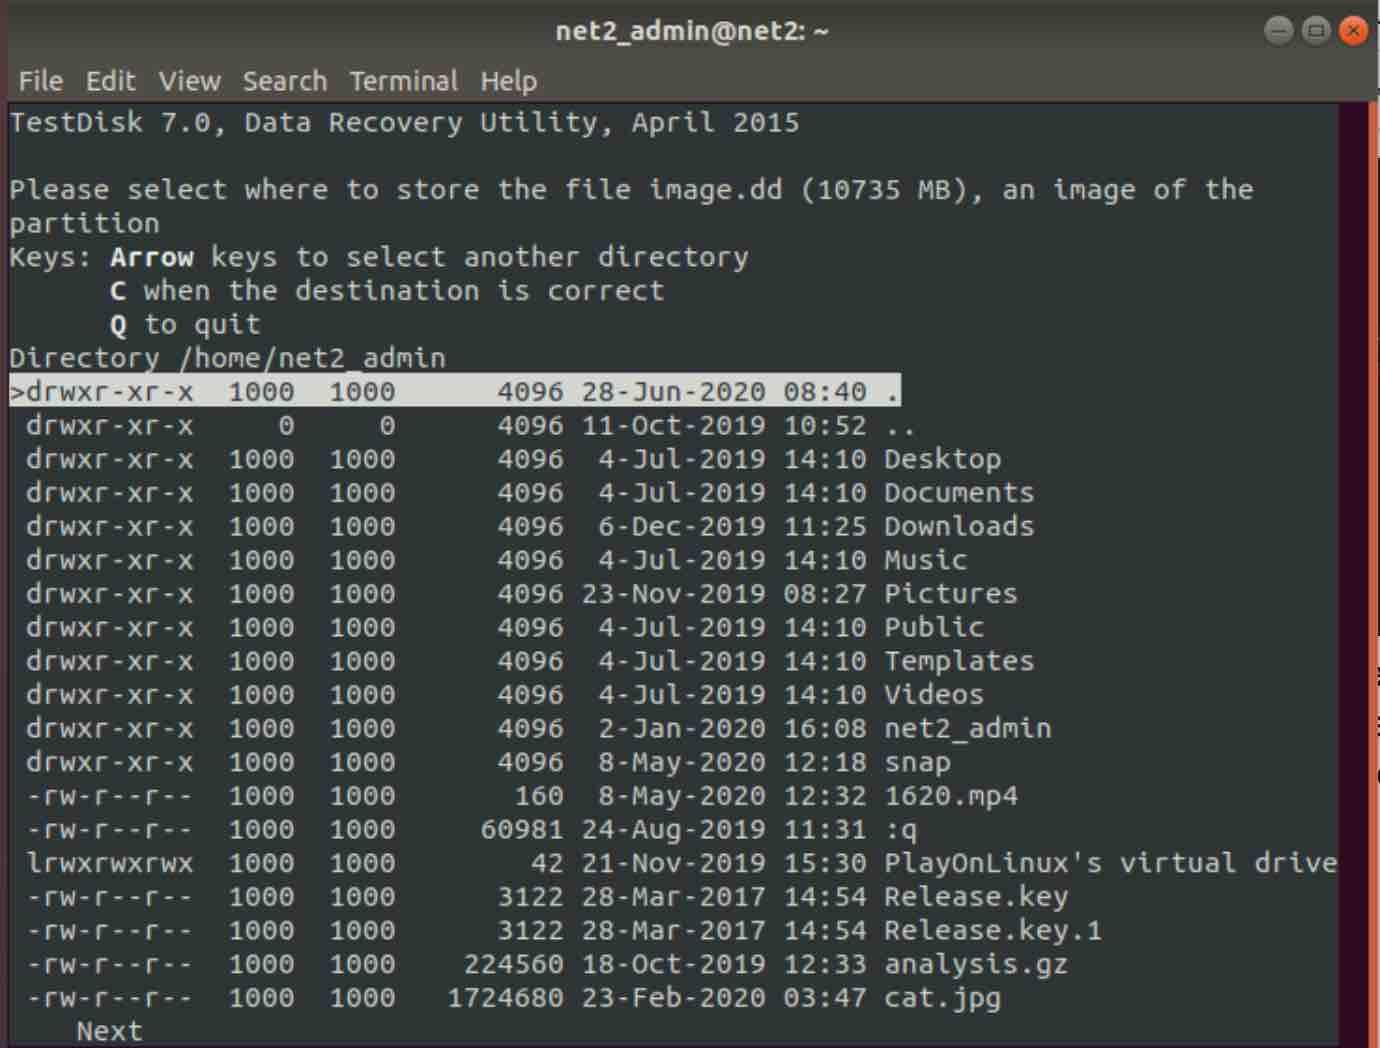
From the output above, testdisk gives you the possibility to create a log file testdisk.log which will contain some important information about your lost files. This is the recommended option.
Linux recover deleted files
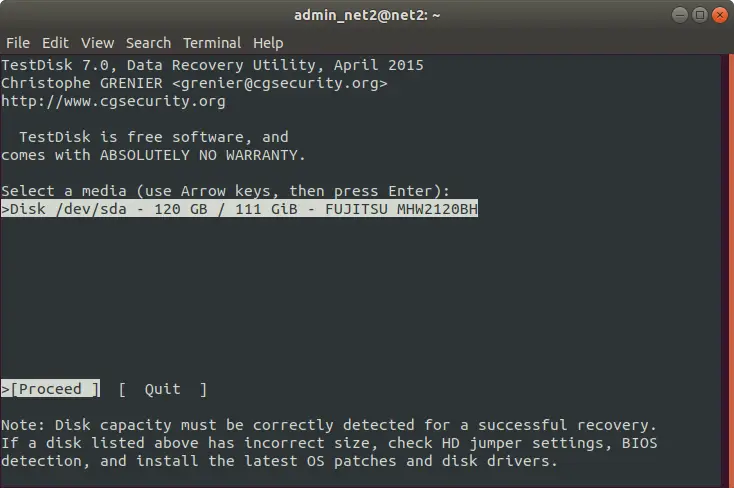
Select your media and choose 'Proceed' then Enter. You will then be prompted to choose the partition table type :
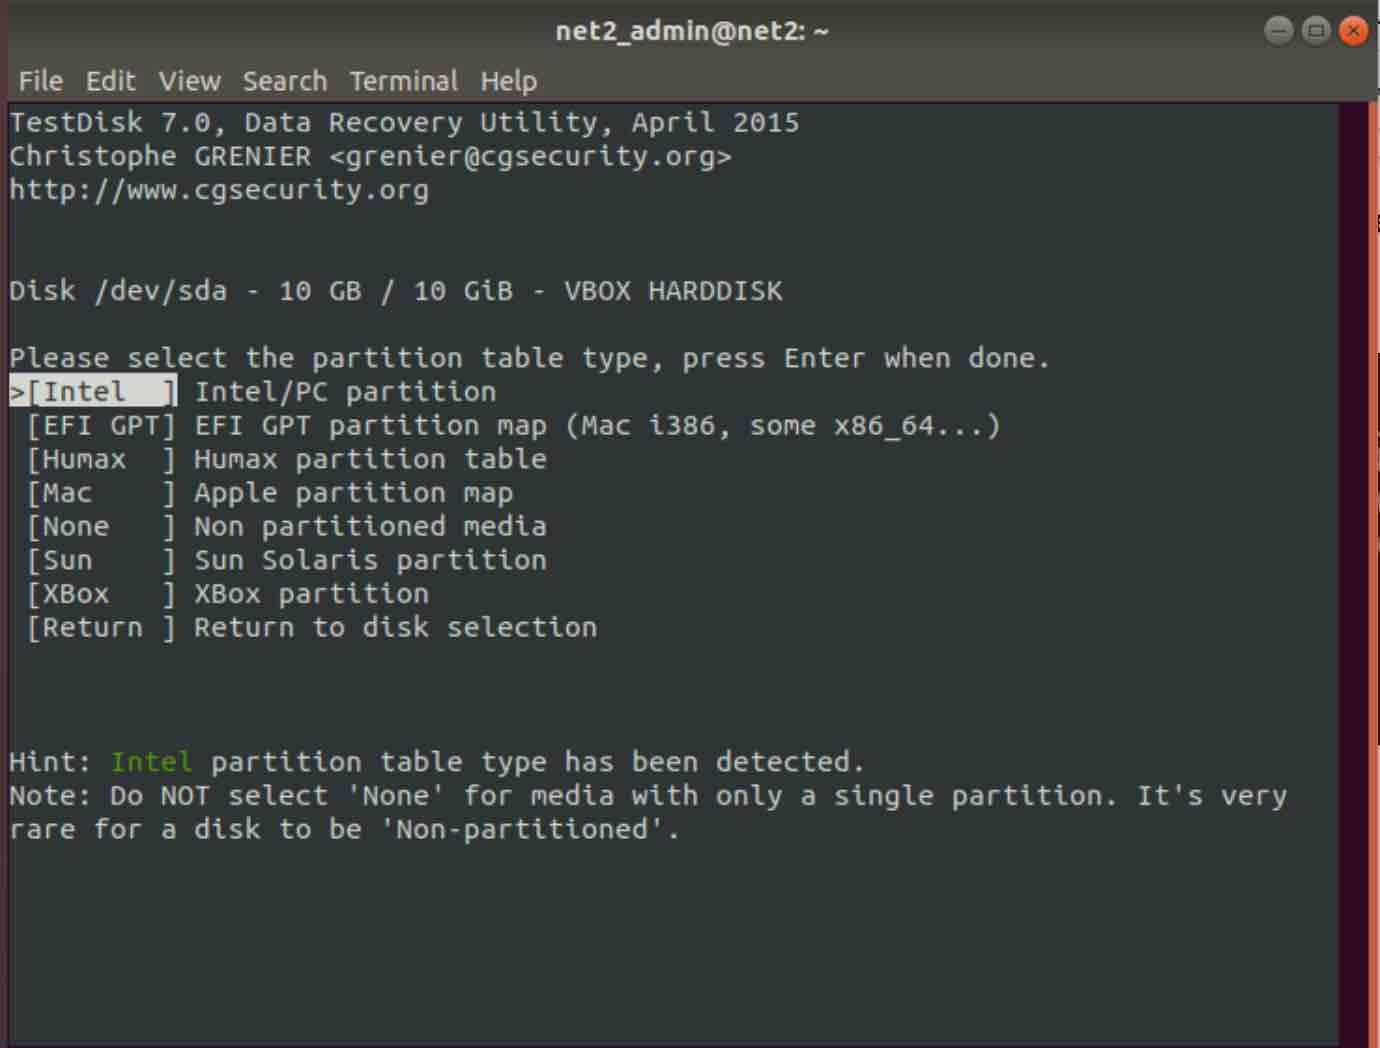
The tool automatically highlights the partition table type as shown above. If you think otherwise, you may want to select the one that suits best your case.
Once you have selected the appropriate drive and partition type, you will see the following :
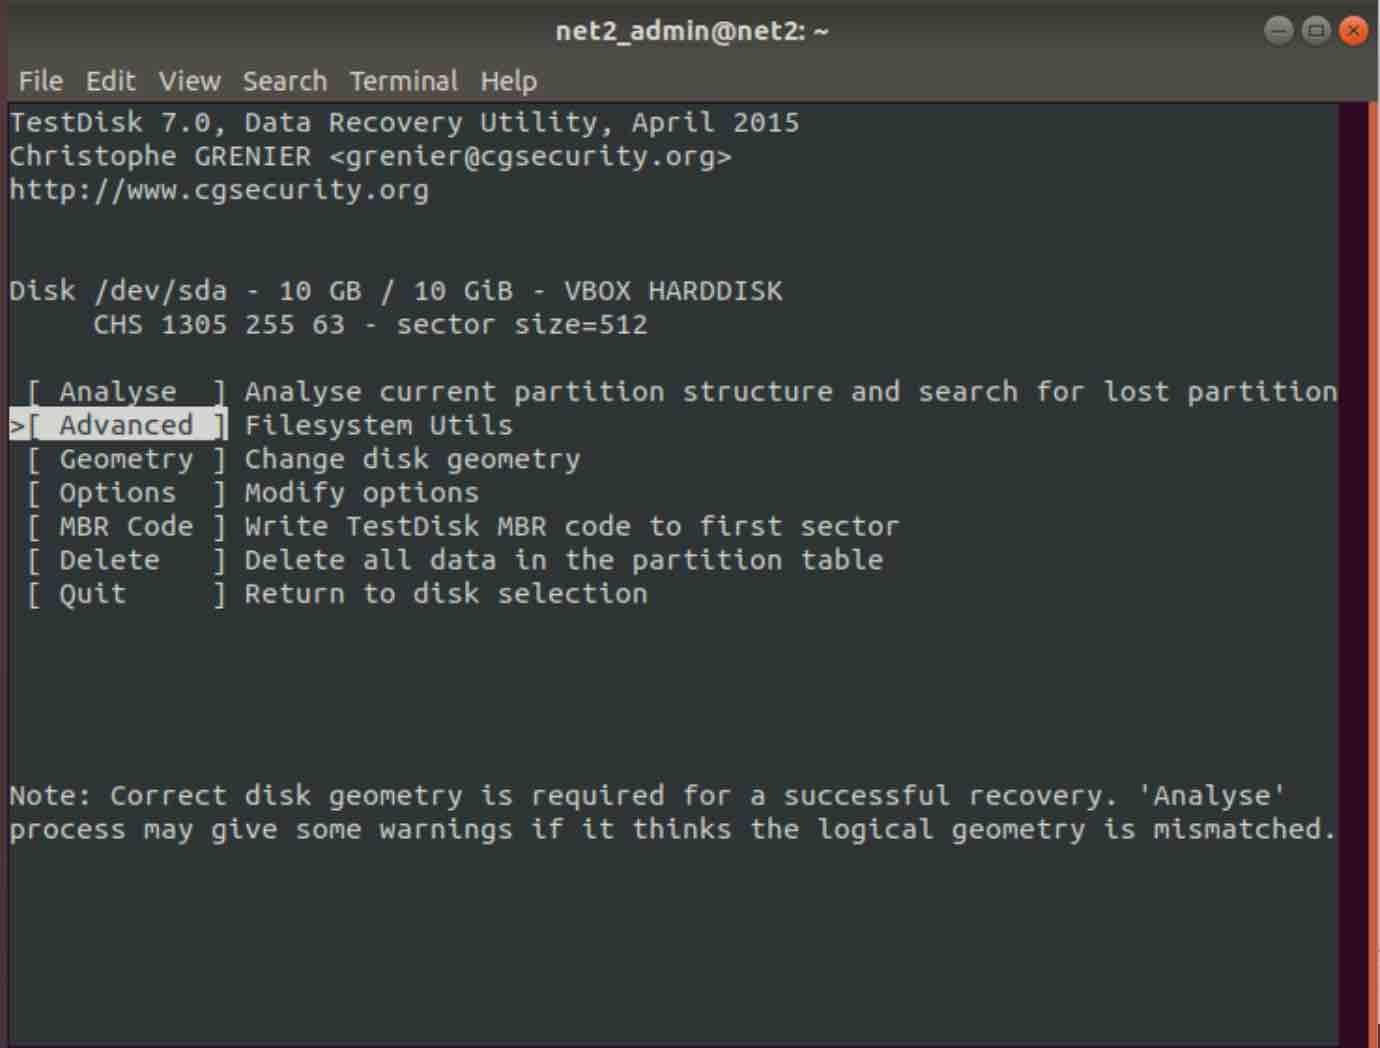
Since you would like to recovering your deleted file, select the option Advanced. Hit Enter.
In case your selected media has several partitions, you will be able to see them in the next screen. Once you have selected the desired partition, you will be able to see a list of all its directories.
Now select the folder where you believe you lost your file and hit Enter. In case the accidentally deleted files were found, you will see them in red as shown in an example scenario below :
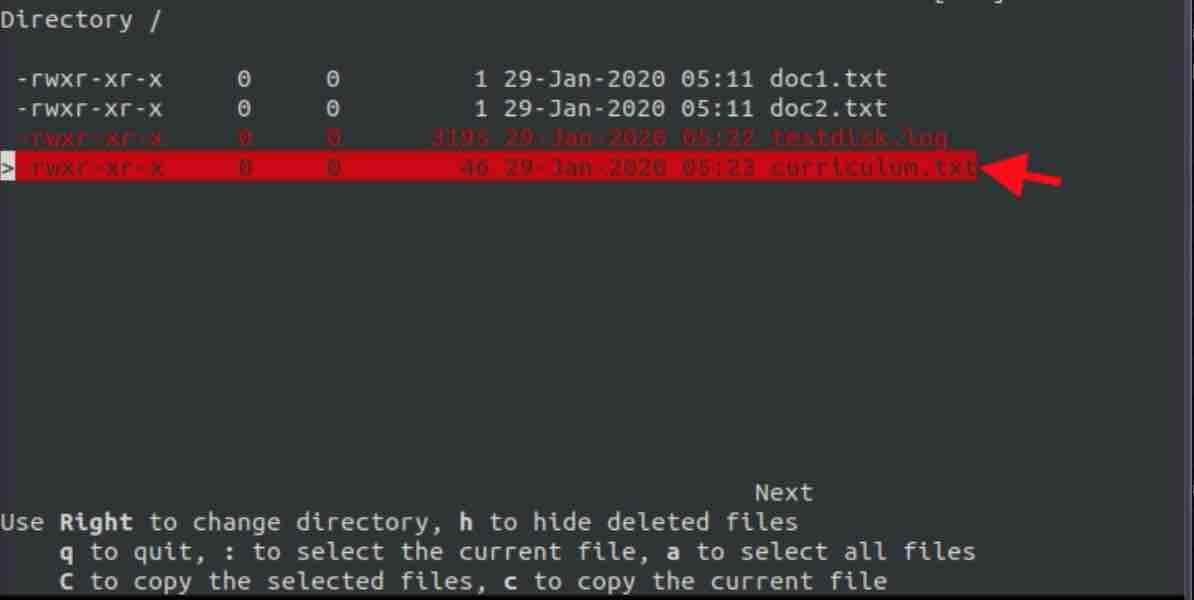
Recover deleted files linux
Select the C option in order to copy the selected file.
Then you will need to choose which directory you want to recover the file to and if all goes well, a greeting message like the following should appear: "Copy done! 1 ok, 0 failed ".
If you did all the steps and got the success message, your file will be safe. Check if the content remains intact, if something went wrong, repeat all steps. And if you did all the steps, your partition type may not be able to be restored using TestDisk, ext4 for example, but don't worry … You can use another tool that is installed together with the TestDisk package, Photorec .
Photorec
Photorec for Linux is a companion tool to TestDisk that was featured in the previous section. In order to have it installed, you just need to run the command below in case you didn't do it already :
sudo apt-get install testdisk
Then invoke the program by running the command:
sudo photorec
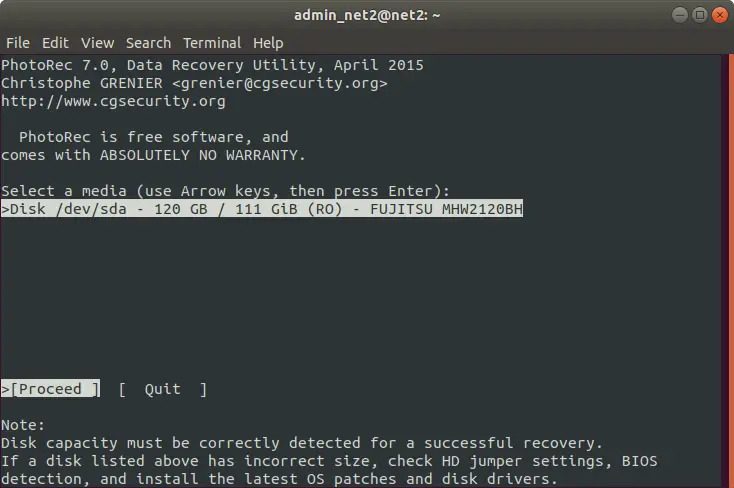
Go ahead and choose your media . Click on "Proceed" then press "Enter" . In the next screens, click on Q to navigate back.
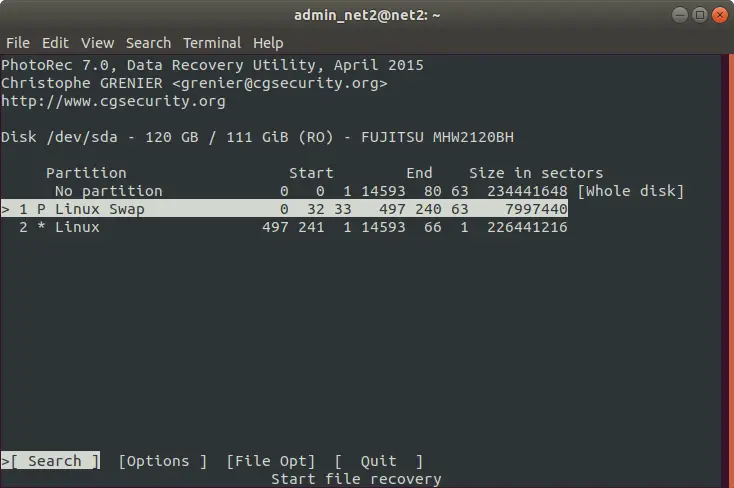
Now you would need to choose your desired partition :
Note: clicking on the [Options] menu item, will display the recovery options below :

Clicking on the menu item [File Opt] will show the following interesting information :
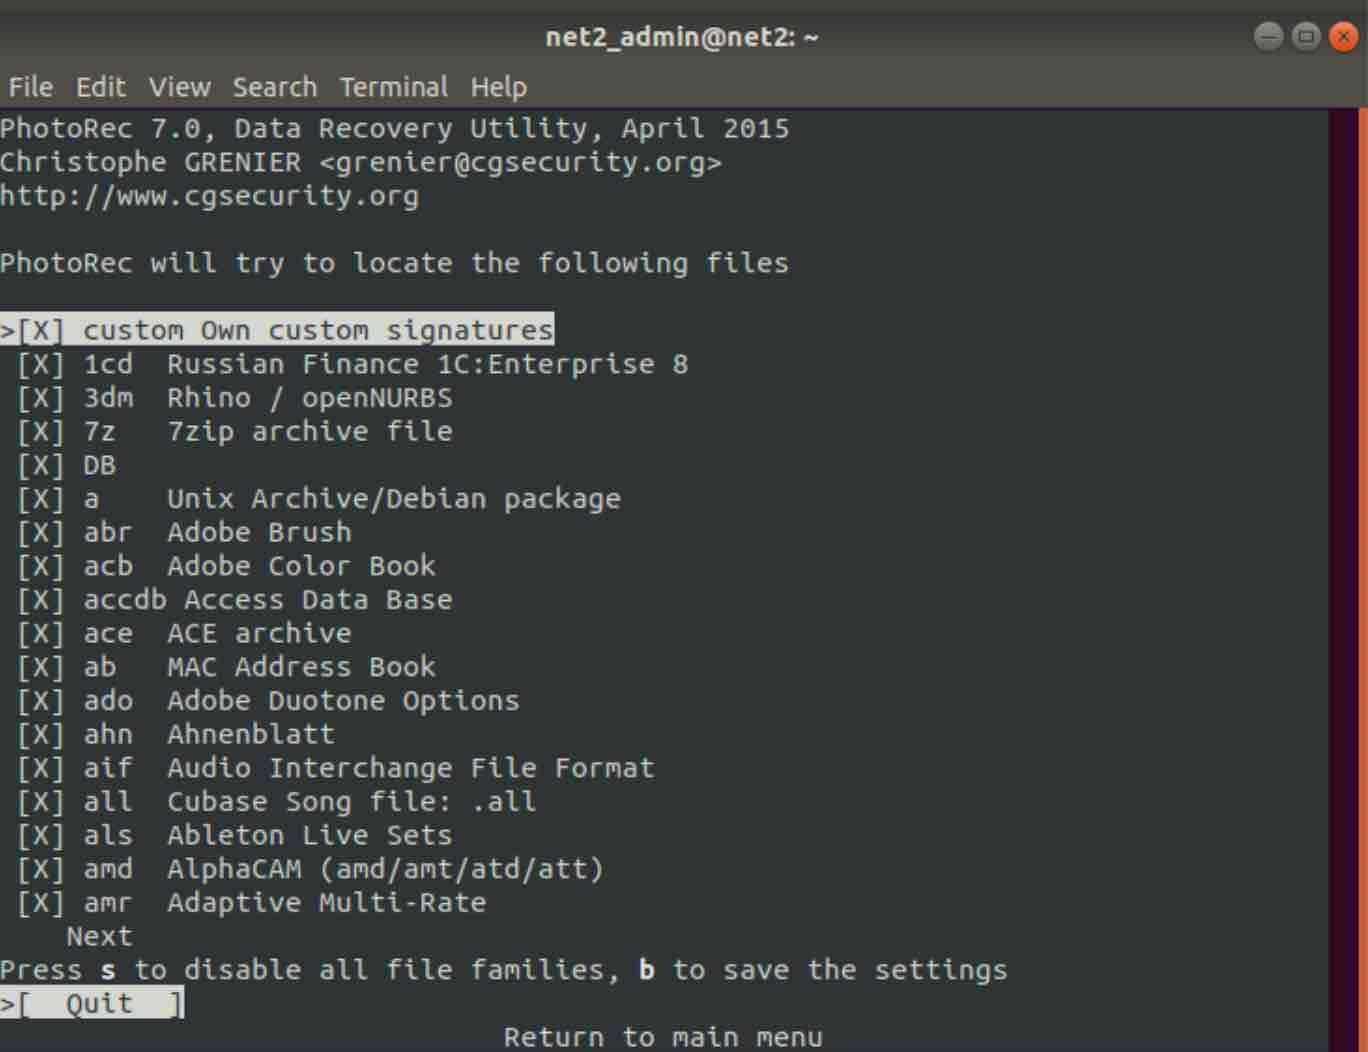
Here you will be able to select your desired file extensions for the recovered files. Once you have selected one or more entries, press s to save .
Now Click on Q twice to move back to the previous screen.

Select "Search" in order to start the recovery procedure.
Note: You may get the screen below with two options:
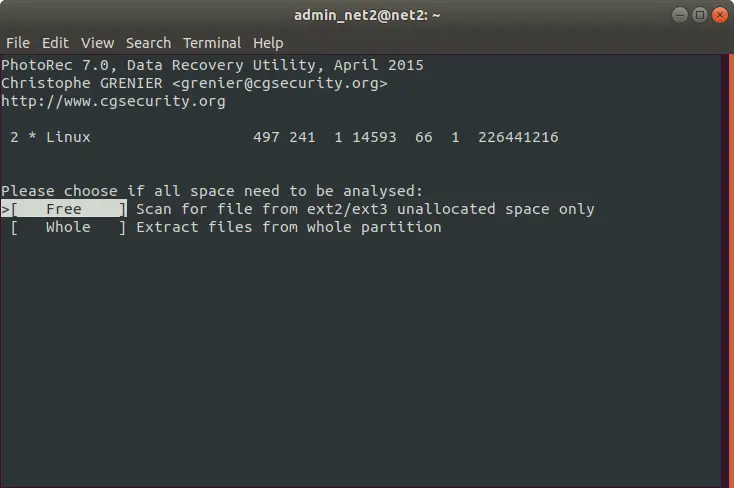
Make sure to select either a free space or the partition as a whole (slower) that need to be analyzed. Press Enter to continue.
Otherwise, in the next screen, you will be able to select the filesystem type :
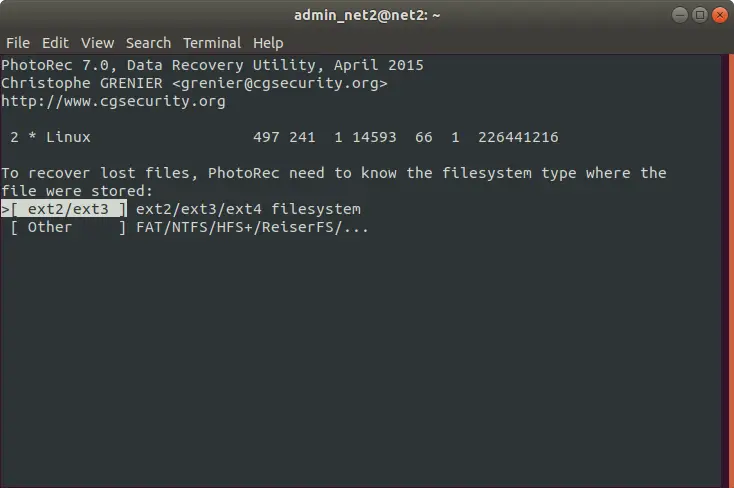
In case your filesystem type is other than ext2/ext3, select the second option "Other".
Next select a folder to store the recovered files and press C to continue. Make sure to select a directory on a partition that is different in order not to overwrite the deleted files.
It is going to start recovering immediately once you press C.
Finally, Photorec will display the number of recovered files as well as their locations.

For additional information, you may want to visit Photorec website.
Ultimate Boot CD
The Ultimate Boot CD is a bootable recovery CD that comes with a variety of built-in tools that give you the functionality and the ability to perform a very useful recovery operation on your computer. The disc consists of a collection of bootable disc images, all stored on a bootable CD.
It offers a wide range of tools such as:
- Data recovery;
- Unit cloning;
- BIOS management, memory and CPU testing tools.
It is available for download in ISO format and can be easily burned to USB or CD.
More experienced users can do a lot with this tool. But newbies must be careful not to break their system instead of repairing it.
For more information visit the official website of the project .
R-Linux
R-Linux is a very interesting program that allows you to recover data from Ext X formatted Linux partitions from both SSDs and traditional disks.
You can download R-Linux from the official website.You will also find R-Studio , which is paid but which also supports working with NTFS partitions. You will be able to test a Demo. Both are also available for Windows and Mac, for Linux there are 32 and 64 bit versions in .deb and .rpm formats. You can Read the tool manual here.
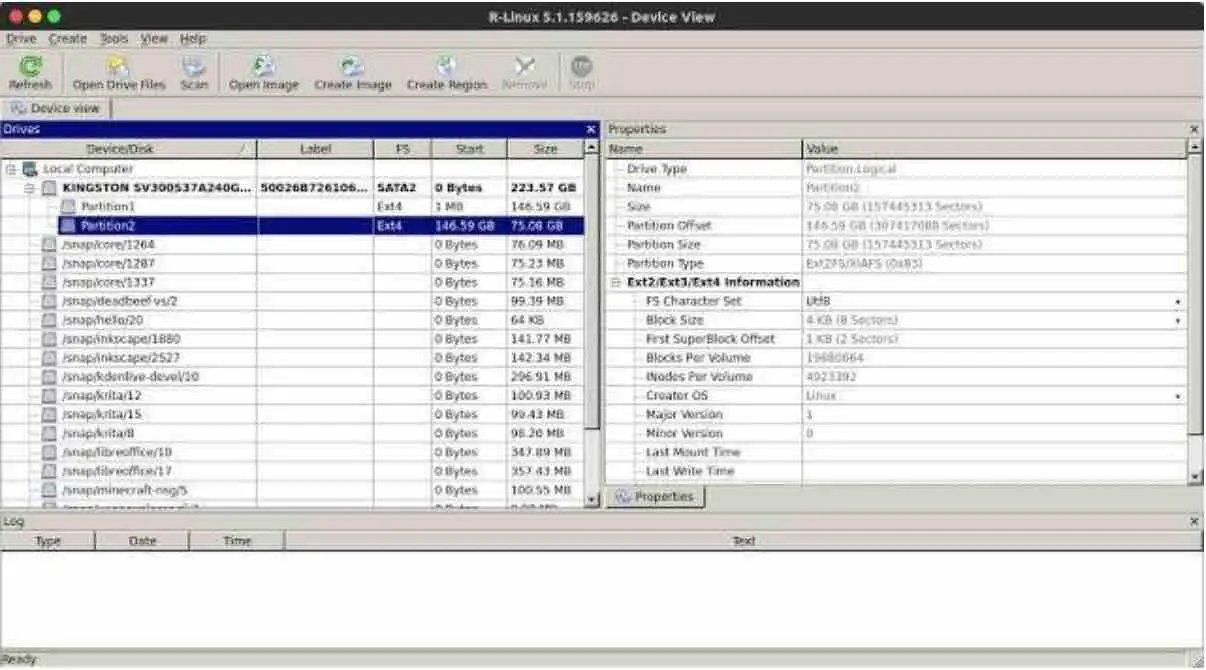
When opening the program, select the disk or partition you want to recover data from:

After selecting the disc, click on the " Scan " button at the top of the program and view the disc information on the right side.
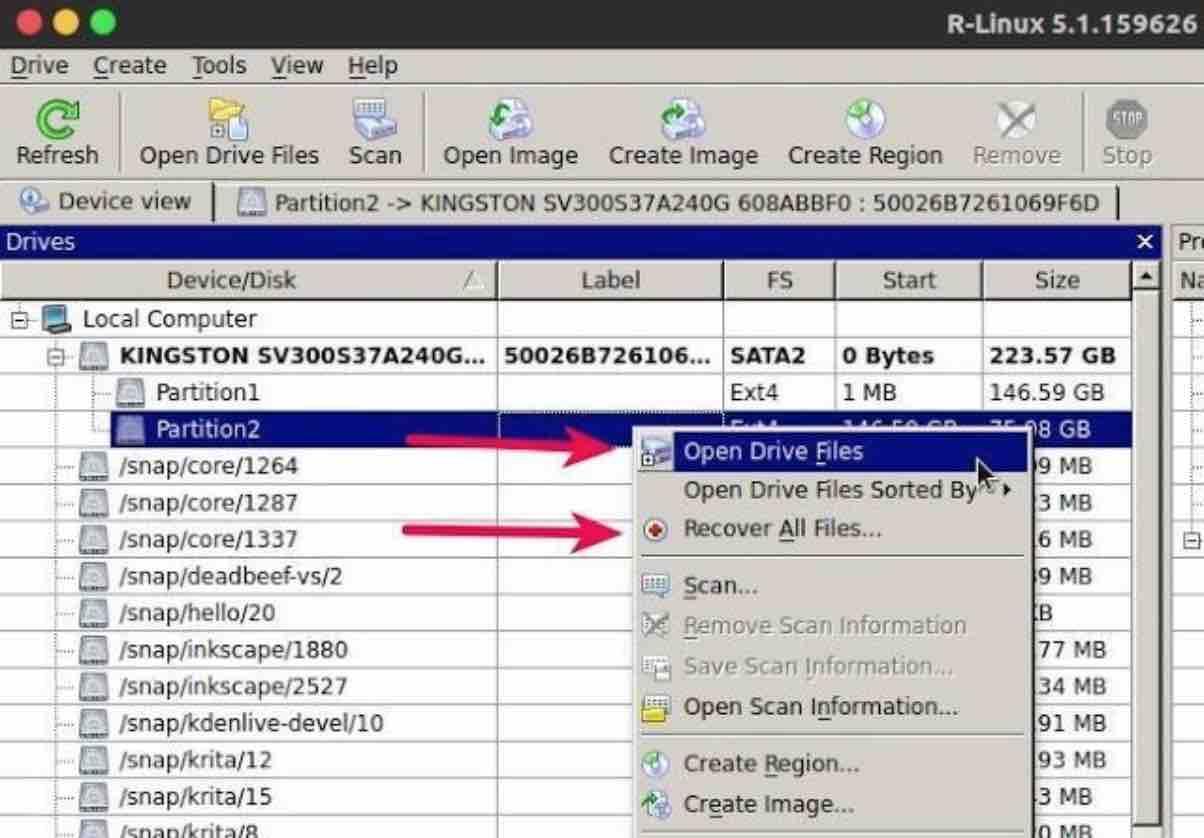
Right click on the partition/disk you want to recover and go to the option "Open Drive Files" which will take you the file manager:
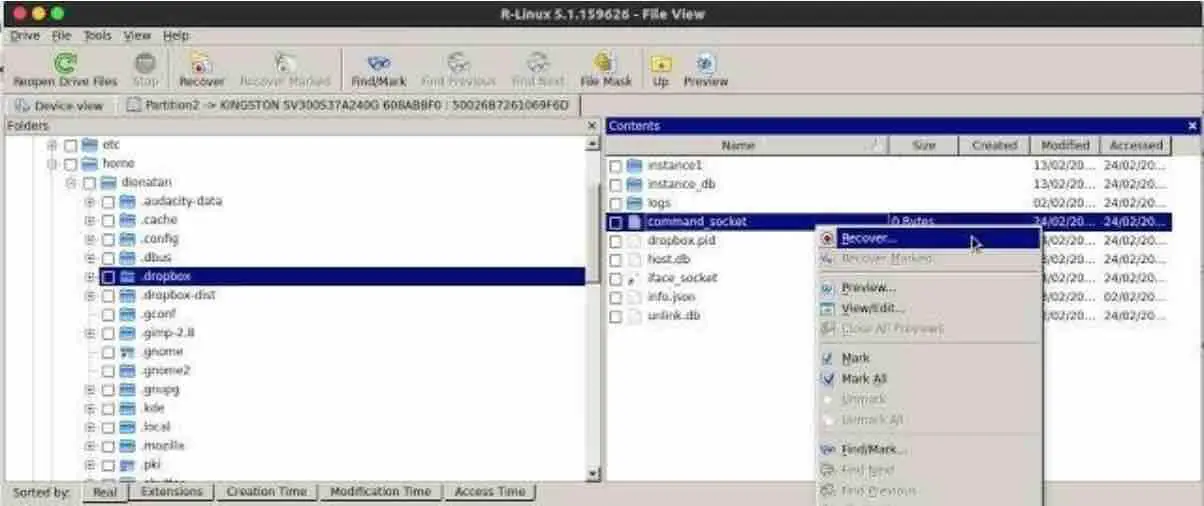
The program will scan your disk. The directories will be displayed on the left and the files inside the directories on the right. To recover a file just right click on the desired file and click on " Recover… ", after that just select the output folder where you want to recover your file. You can also recover one more file at the same time.
You also have the possibility to recover all files by selecting the option" Recover All Files ", as shown in the image above. This will allow you to recover all possible files. Make sure in case you select this option, to have enough storage to place the recovered files. Note down also the size of the disk or partition you are going to recover.
Trinity Rescue Kit
The Trinity Rescue Kit is based on Linux and is designed for recovery and repair of Windows or Linux machines. You can load it onto a USB or CD and start it up.

The boot menu offers boot options similar to most Linux distributions. Once started, a variety of tools are made available. Among them we can mention:
- Data backup;
- Recover data;
- Exchange units;
- Modify or recover partitions and perform Rootkit detection.
- Antivirus scanners, including Avast , ClamAV and BitDefender.
Do not let the screen in text mode intimidate you, its use is very simple.
For more information visit the official website of the project .
Rescatux
Rescatux is a Linux-based distribution designed to solve problems with Linux and Windows. It comes with a wizard called Rescapp that provides access to the tools available on the Rescatux CD .
With the help of Rescapp , you can perform tasks such as resetting passwords, restoring GRUB on Linux or Master Boot Record on Windows. You can also perform checks for your file system, repair damaged partitions and recover deleted files.
For more information visit the official website of the project .
SystemRescueCD
The SystemRescueCD is a powerful tool to repair Linux systems. It was developed with system administrators in mind. It can be used to troubleshoot Windows and Linux servers and systems. When you boot the system, a console interface is loaded with boot options.

It has a wide range of tools to manage and repair partitions. You can also back up your data and troubleshoot the boot loader. A ton of antivirus and detection tools are provided . The SystemRescueCD is available for download as an ISO file so that you can burn it to a CD or create a USB drive.
For more information, see the project website .
DDRescue
GNU DDRescue is a data recovery tool with which you can back up data on various types of storage units. It copies data from one file or block device (hard disk, partition, etc.) to another, trying to recover the "good" parts first, in case of reading errors. Very useful for recovering files on disks with bad blocks .
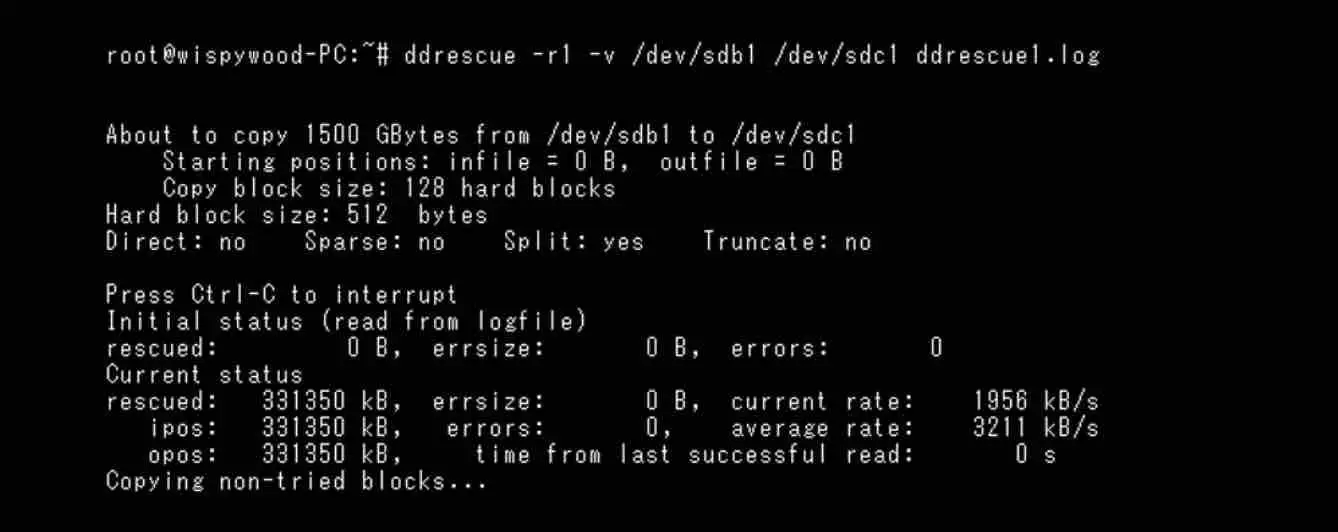
The operation of DDR is fully automatic. That is, you don't have to wait if an error occurs. There is no need to restart it from a new position either. DDRrescue does not write zeros when it finds bad sectors on the source media and does not truncate the output file. So, every time you run it on the same device, it tries to fill in the gaps without erasing the data that has already been recovered.
MORE INFORMATION Official Website.
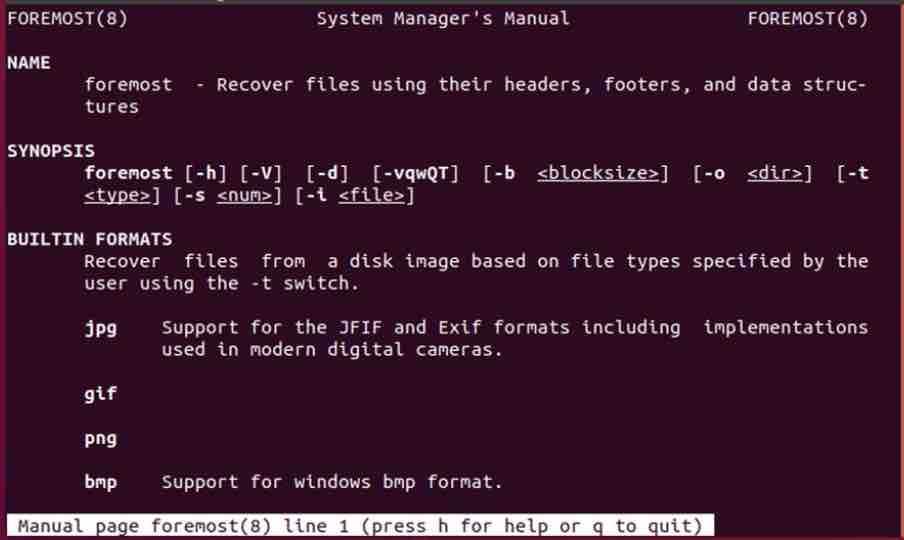
Foremost
Foremost is a Linux utility that has been developed for the sole purpose of recovering deleted files. One of its great advantages is that you can use it to recover files in different formats (jpg, gif, png, bmp, avi, tiff, mp4, exe, mpg, wav, asf, wma, mp3, fws, riff, wmv, mov, pdf, ole, doc, docx , xls, xlsx. ppt, pptx, zip, rar, html, cpp, java, art, pst, ost, dbx, idx, mbx, wpc, pgp, txt, rpm, dat…). Foremost executes a forensic search on the hard drive or image file to recover and rescue files on linux .
Why is Foremost effective for this task? Very simply, when you delete a file from the system and send it to the trash, it will remain there until you empty it out. if the trash content is deleted, it does not mean that the files are gone forever. Foremost might be able to recover your files but not always the full content.
Foremost can be installed using the command below for Ubuntu and similar distros:
sudo apt install foremost
The basic command to rescue jpg files for instance would be similar to:
sudo foremost -t jpg -i /dev/sda1 -o /home/net2/recovered
To recover docx files , use a command similar to :
foremost -v -t docx -i /dev/sda1 -o /home/net2/recovered
Note: Usually the logic is always :
foremost -i input_file -the output_directory
Remember that after recovery, the file name is usually changed by Foremost and do not forget to close all applications that can generate files. Only then you will be able to execute the commands.
ExtUndelete
For Linux file systems Ext3 and Ext4, the recovery is more complicated. This is due to the fact that these file systems have been trimmed for the optimal use of space. The memory space freed up by the deletion is therefore rewritten very quickly. If you have noticed the error, you must immediately prevent write access to the data media so that the deleted object is not overwritten by another application. You can specify read-only access in the terminal with the command below:
mount -o remount,ro /dev/sda1 oder mount -o remount,ro /media
You would have to adapt the command to your own settings, i.e. the device name ("sda1") or the mount point ("media"). Attempting to recover data always carries the risk that data will be lost, it is therefore recommended to make a full backup of the disk beforehand.
To instal extundelete, run the command below :
sudo apt-get install extundelete
Now let's run the command below to know the name of your computer's partitions, this step is necessary to know how to use the next command:
sudo fdisk -l

Read: Fdisk usage on Linux
Now to recover the data on the desired partition, just use the command:
sudo extundelete /dev/sda1 –restore-all
If you want to send the files to a specific folder run a command similar to the following:
sudo extundelete –output-dir '/dev/sdb1/recovery' –restore-all /dev/sda2
The tool is configured so that after the transfer of a partition or file that is being examined, it will write all files found to the current directory.
In this case, the software will try to restore all files that can be found ("—restore-all"). In case you would like to specify which file you would want to recover, run the command below:
extundelete –restore-file my_data.txt' /dev/sdb1
For the special case of deleted photo files on a memory card, Linux has a special application that is also easy to use. You can find the "recoverjpeg" package with your package manager or the Ubuntu or Linux Mint software center.
Deft Linux
DEFT Linux , a Linux distribution created in Italy, it aims to assist investigators, system administrators or anyone who wants to perform a forensic analysis on a computer, be it Linux or Windows. It makes it possible to discover what happened during a given computer incident through the analysis of the tracks left .
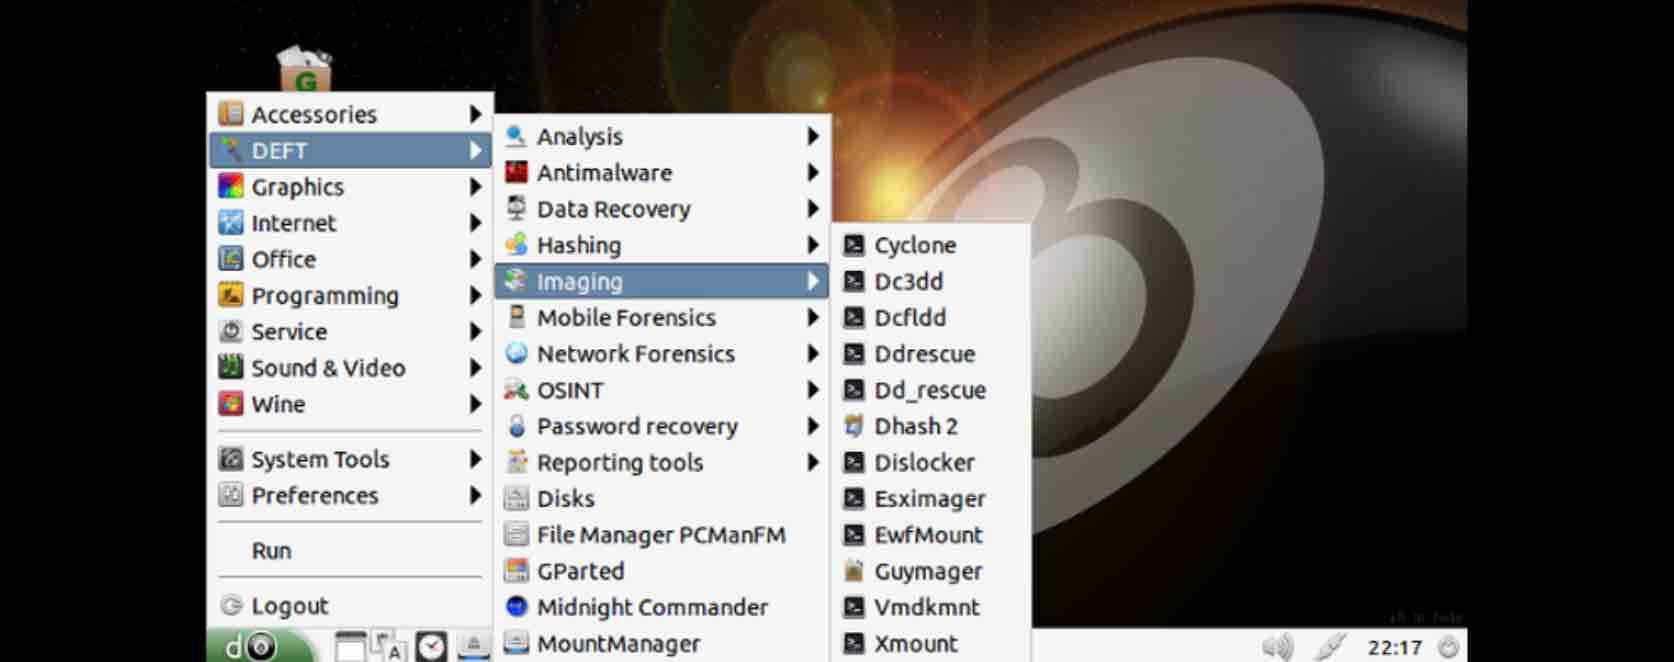
In addition, it is possible to recover accidentally removed files with ddrescue and photorec as shown in the snapshot above.
MORE INFORMATION Official Website.
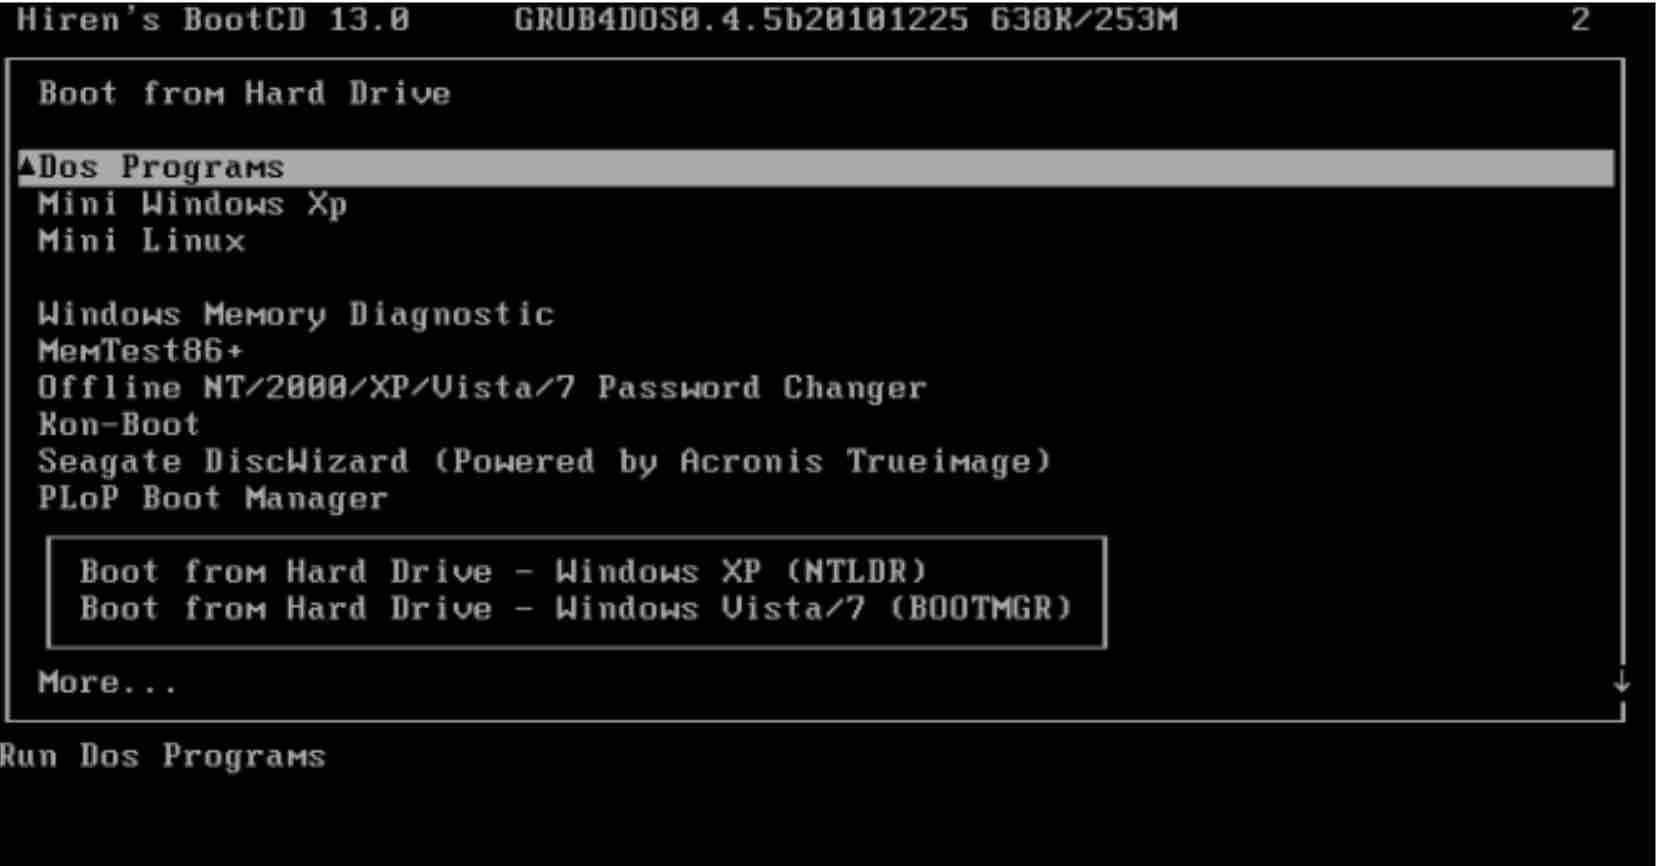
Hiren's BootCD
Hiren's BootCD is a popular Linux-based recovery system, however, within the live cd a kind of live Windows is also found. It is regarded as "a first aid kit for your computer" and with good reason. It contains the main features:
- Defragmentation tools;
- Driver tools;
- Backup tools;
- Anti-virus and anti-malware tools;
- Rootkit detection tools;
- Secure data cleaning tools;
- Partitioning tools;
- Among others.
It also has other useful utilities, including resetting your system's BIOS, clearing your CMOS , clearing temporary files and folders. You can also securely delete data or back up your data to another drive, recover damaged partitions, or even scan your system for hardware failures.
It is capable of much more. As a recovery software, it should be first on your list. Hiren's Boot CD is available for download as an ISO for easy installation on USB or burning to a CD.
For more information visit the official website of the project .
If you like the content, we would appreciate your support by buying us a coffee. Thank you so much for your visit and support.
How To Clear Lsof Deleted Files In Linux
Source: https://net2.com/how-to-recover-deleted-files-on-linux/
Posted by: longfusent.blogspot.com
0 Response to "How To Clear Lsof Deleted Files In Linux"
Post a Comment